DIY Magnets
Why Magnets?
On the first Tuesday of the month, Compeer leads art activities at Common Good, a community building located at 212 W Warren St. Shelby, NC. During these activities, Compeer staff make crafts for folks receiving monthly Community Supported Friendship gift bags and visitors are invited to make their own to take with them.
For our August art activity, we made custom magnets using magazines and other basic materials you can find at your local craft store. The materials used in this tutorial can create a lot of magnets, so this activity is perfect for groups or for gifts.
Items you’ll need:
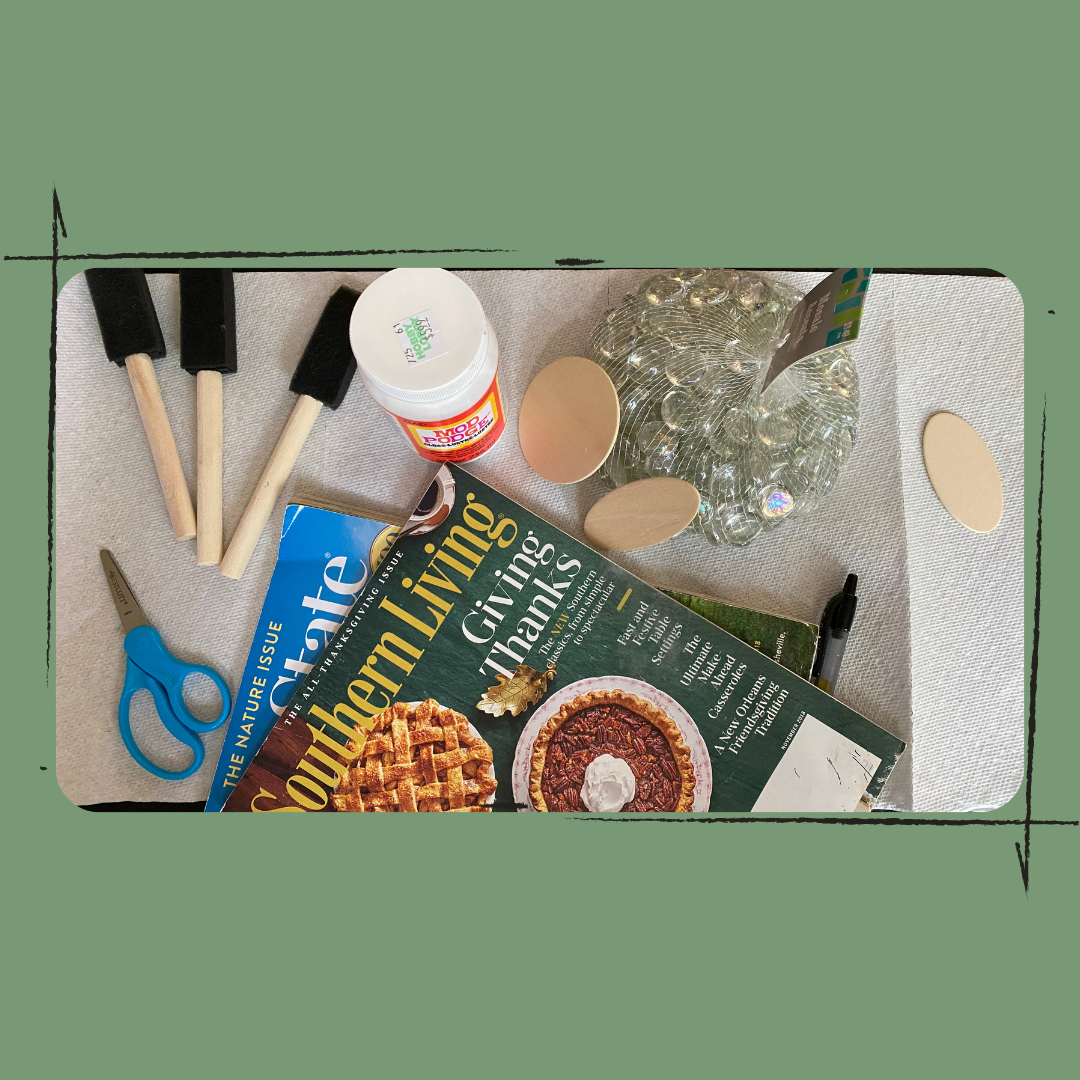
Magazine(s)
Mod Podge
Foam brush (or any cheap brush for applying the Mod Podge)
Scissors
A pen or pencil
Hot glue gun and hot glue (not pictured)
How to Make the Magnets:
Step 1: Pick what kind of magnet you want to make
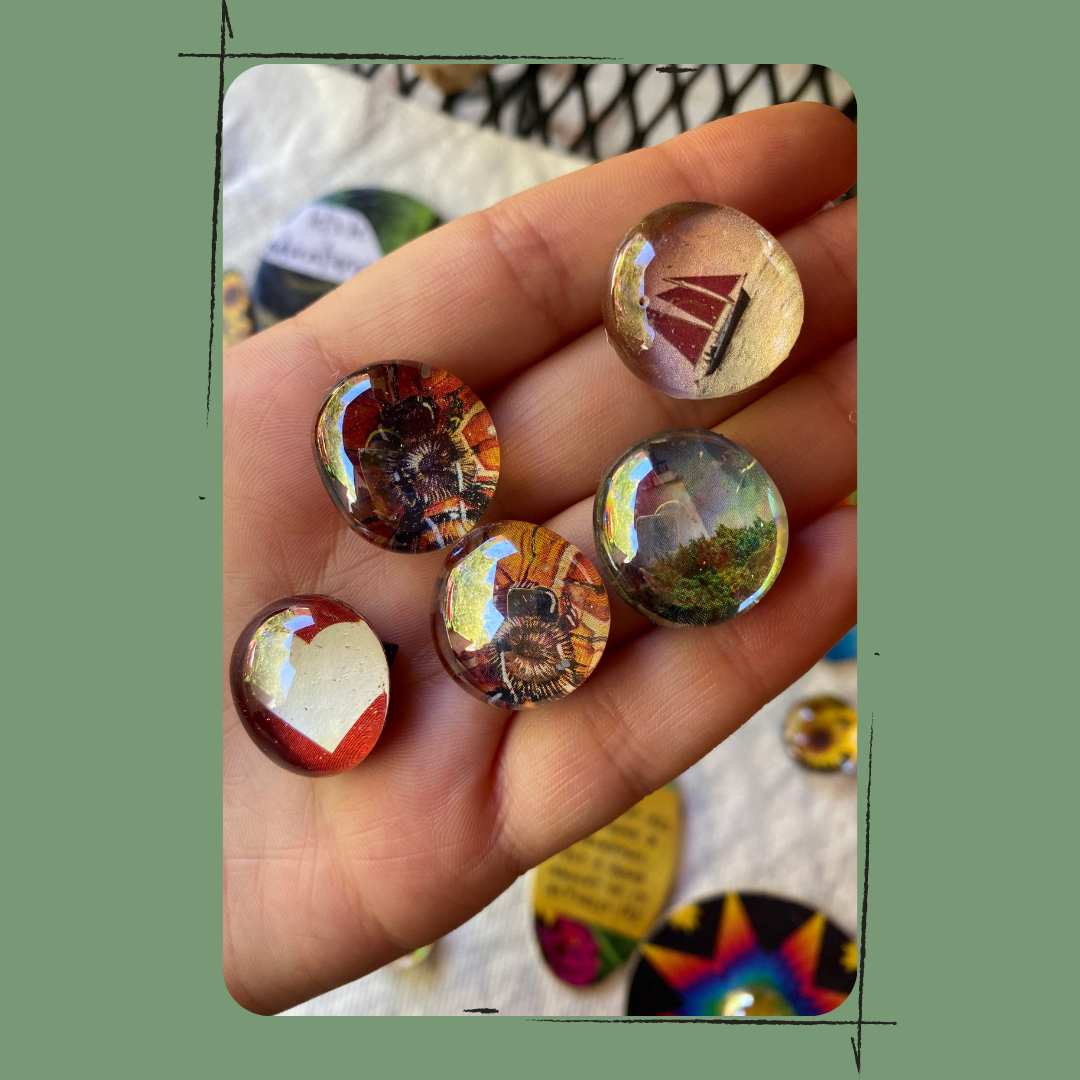
First, you’ll want to decide which type of magnet you want to make. Both types use the same materials, but the glass marbles are smaller and therefore will make smaller magnets. Using the glass marbles can lead to really cool results since the glass magnifies whatever image you decide to use along with it. I would recommend choosing patterns or small images with these magnets, since you won’t be able to see too big of a picture.
If you’d like a bigger magnet with more customization options, use a craft wooden round. These can come in a variety of sizes and shapes ranging from circles to hearts to stars. Any shape will work, but for the purposes of this blog, we used oval, circular, and tear-drop shaped wood rounds.
Another thing to remember is that some glass flat marbles have been dyed, have special coating on them to make them shiny or pearlescent, or may even have bubbles inside of them from when they were manufactured. If these will bother you, then you’ll want to check your marble carefully before gluing. You can do this at any stage before you put the Mod Podge on the marble.
Step 2: Finding images that will fit your magnet
For this craft, we used magazines and chose whatever images and patterns we came across. Depending on which kind of magnet you make, you’ll want to make sure the image fits on the surface of whichever material you’re using.
If you choose to make small magnets using the glass flat marbles, I recommend placing the flat side over the image you have in mind to make sure it fits. As you can see in the pictures here, I chose a picture of a sailboat, which fit the circumference of the marble perfectly.
For the wooden rounds, you’ll want to place the image on the top of the wood shape and use your fingers to feel where the wooden shape ends. I originally chose a picture of a pie, but decided to switch to a different image (as you’ll see later on) because it didn’t quite look the way I wanted it to.

Right. The two images I’ve chosen for my magnets.
Step 3: Mod Podge & cut it!
Once you’ve chosen your desired images, cut the image out with about an inch of extra space around the image you intend to use. For example, if you are using a wooden round, you’ll want to cut out about an inch larger than the wooden round. Ideally, the image you choose should fit on the wooden piece to your liking, however the extra space will give you room to adjust and cut to size (once dried - this step will come later). This is the mistake I made with the picture of the pie. I did not alot myself enough space to place the section of the picture I wanted to on my wooden round and it made the pie look a little wonky. Thankfully, Mod Podge is a forgiving medium, as are the wooden rounds.
When you’re ready to glue your image to the material, you’ll want to place your wooden round or glass flat marble with the side you're pasting the image to facing up. For the wooden round, this can be either side. If you are using the glass flat marble, this will be the flat side.
Since the method of gluing is going to be different depending on which material you’re using, I’m going to describe them separately to avoid confusion:
Wooden Rounds

If you are using the wooden round, dip your brush into the Mod Podge and apply a layer of glue to the wood surface.
Next, take the image you want to use and position over top of the wooden round before slowly lowering it onto the Mod Podge’d surface. If you are not concerned with getting the image perfectly within the perimeter of the wooden round, you can use your fingers to smooth out the image. Use your fingers to gently push out air bubbles and smooth out any wrinkles.
If you would like a specific portion image to fit within the perimeter of your magnet, use a pencil to gently trace the shape on the backside of the image. When you glue the image down, place the magazine image face down And hold the wooden round in your hand, freshly Mod Podge side facing down. Slowly lower the wooden round and place within the lines you’ve traced on the back of the image. Apply light pressure. Then, gently flip over the wooden round (which should now have the image stuck to it). If there are wrinkles or air bubbles, use your fingers to carefully smooth them out.

Once you’ve smoothed out the image, let it sit for about 15 minutes to dry. When it has dried, you’re ready to cut it and glue down the sides. This process can be a little messy depending on the shape of your magnet and how much you’re able to trim down. If you’re using a shape like a circle or square, you can trim the image to size. However, if you have more complex shapes, you may want to use a combination of trimming and gluing.
If you are having difficulty cutting perfectly to size, take the image edges and use the Mod Podge to glue them down to the backside of the wooden round (as seen above). This is the side the adhesive magnet will stick to so there’s no need for it to look perfect. Many of the magnets shown this blog post have the sides of the image folded and glued down on the backside in ways that are less-than-visually-pleasing. Thankfully this won’t be the side you’re looking at when the magnet is hanging on your refrigerator! If you decide to glue them down, be sure to let it dry before moving on.

Finally, once the edges have been trimmed or glued down, you should add another layer of Mod Podge on top of the image. The Mod Podge will dry clear, so don’t be worried if it is white at first. Do your best to smooth out the Mod Podge into an even layer. The glue will dry the way it settles, so if you do not want your image to have streaks, try your best to smooth out the glue.
On the left, you can see what the streaks look like while drying.
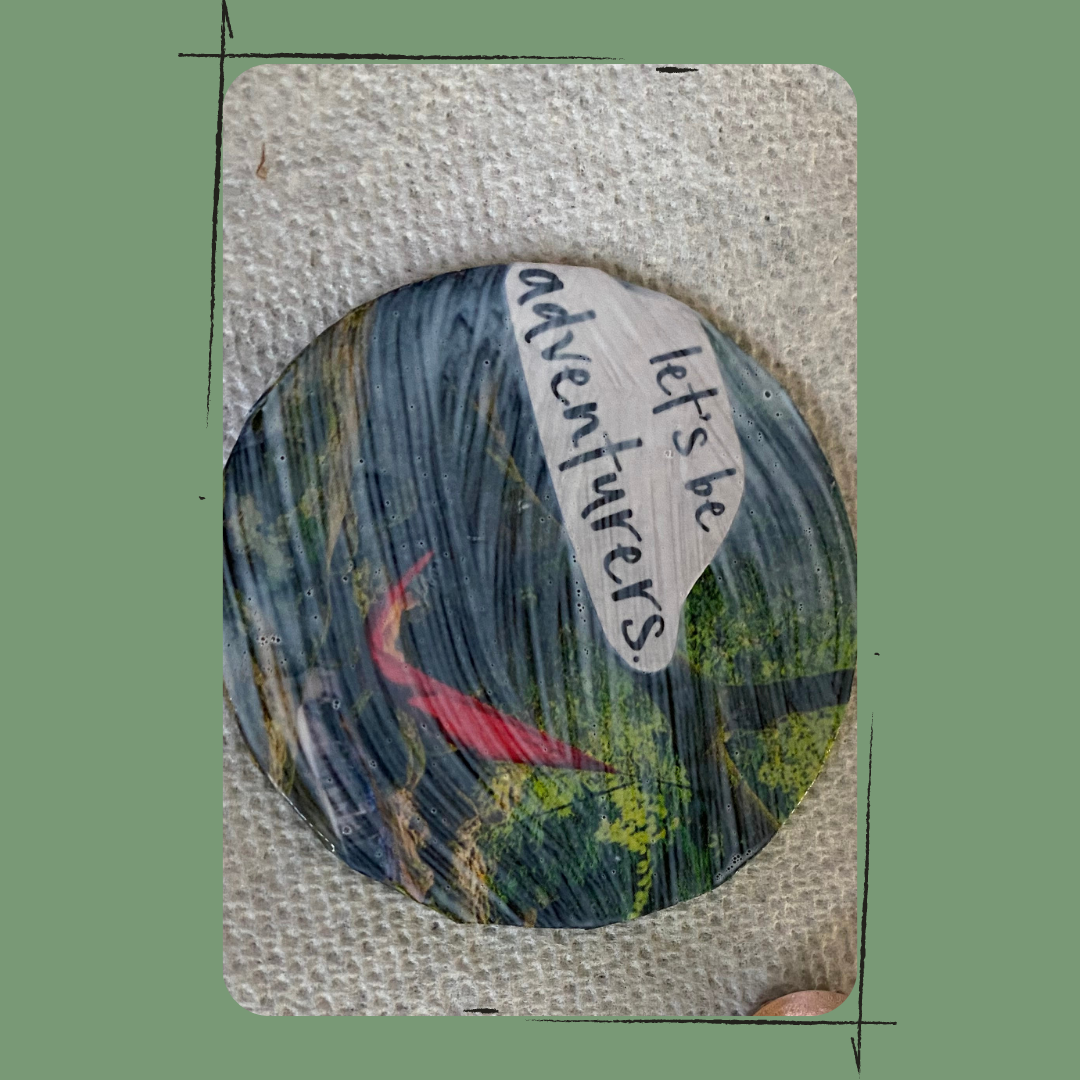
For magnets with more of a collage-look or with layered images (like quotes), I added a layer of Mod Podge between each image. For example, with the magnet I made for this blog, I placed the image of the person in the hammock on the wooden round first. Then, I added a layer of Mod Podge on top. After the layer dried, I placed the quote (“Let’s be adventurers”) on the round where I wanted it positioned. Finally, I took my brush and added a last layer of Mod Podge over top. Set it aside to dry for 15 more minutes.
Glass Flat Marbles
So you’ve decided to use the glass marbles. That also means you’ve decided to work with a much smaller surface area. Thankfully, it’s really hard to mess these up so the only thing you really need to worry about is making sure the picture or pattern you’ve picked looks how you want it to by placing the flat surface on the image and seeing what it looks like before you glue. This is arguably the hardest part.

When you’re ready to glue the image down, you’re better off placing the image face up on a flat surface first. Then, hold the marble in your hand and use your brush to apply Mod Podge to the flat side. You won’t need a lot, just try to make sure there is a nice even layer.

Next, hold the marble so that the flat side is facing the surface you are working on. Lower the marble over the image and press it down. Do not press the marble too hard or it may slip and the image will not align the way you want it. It will be hard to see the picture while the Mod Podge is still wet. This is okay, just do your best to estimate where the image is positioned.
You can also use the wet surface to your advantage. If you placed the marble incorrectly, you can move it pretty easily into place (this is why the extra space is so important).

Once you have positioned your marble, let it sit for about 15 minutes to dry. When the Mod Podge has dried, it will be clear and you should be able to see the picture through the marble.
You can now lift the marble and the image should remain in place. Take your scissors and cut to size. To make sure the image sticks, I add a thin layer of Mod Podge on the back. Then, I set it to the side to dry for 15 minutes.
Step 4: Adding the magnet tape
For our magnets, we used adhesive magnet tape and hot glue. I tried both hot gluing the magnet to the wooden round/glass flat marble as well as securing the magnet with its adhesive side. I found that hot glue, if left to dry overnight, makes for a more secure magnet than just the magnet tape alone. Either way, please make sure when you place your magnet to apply some pressure and let it sit (without being hung) for a full 24 hours.

Here you can see what the magnet tape looks like once it has been secured to the back of a wooden round. Based on which ever material or shape you use, just cut the magnet tape to size.
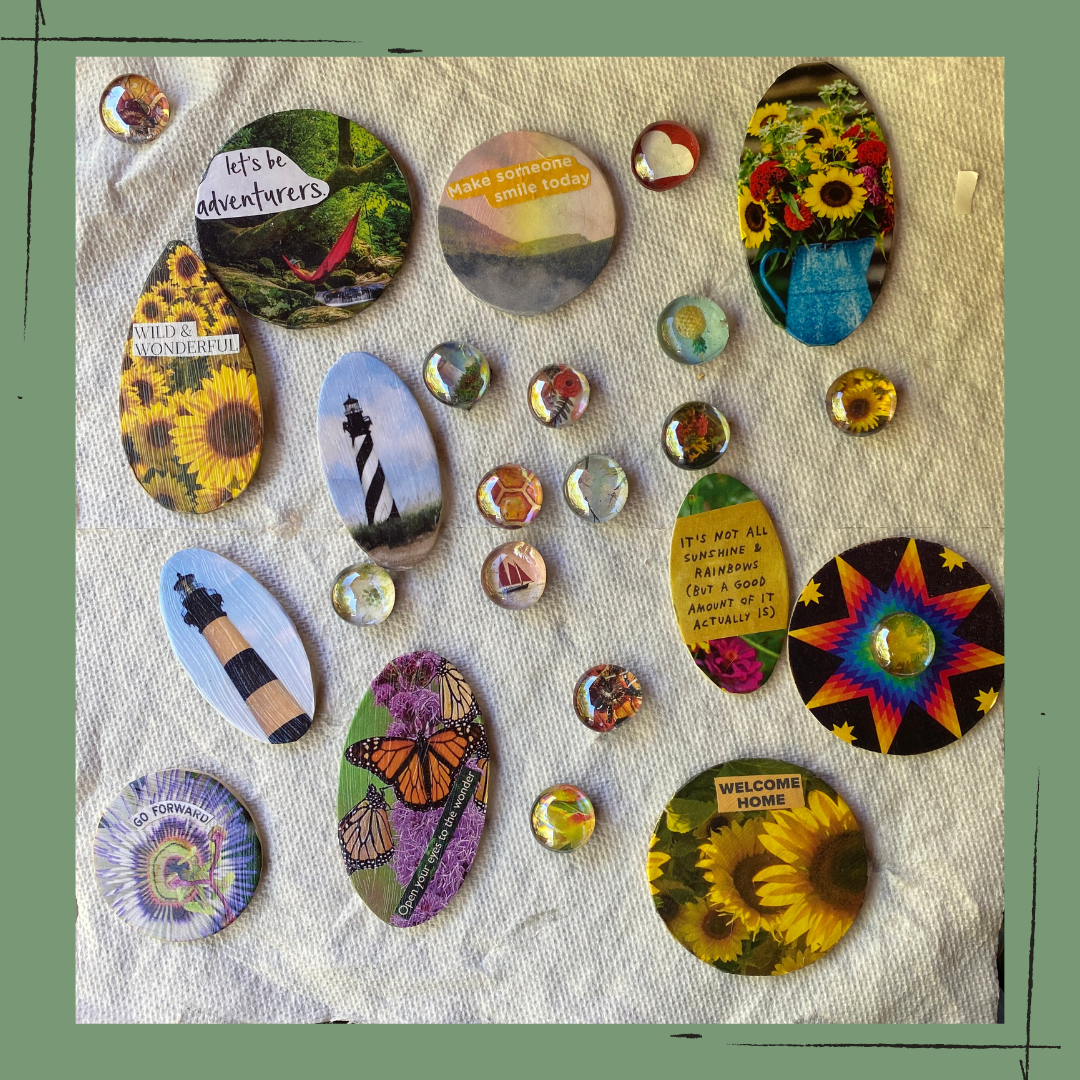
Step 5: Hang it up!
Congrats, you’ve just made a handmade magnet. Go forth with your knew craft to gift or decorate around your house. Enjoy the photos below of the finished magnets we shared with our CSF participants.